Updated: October 2021
Overview
CocoaPods is a software program that manages the dependencies (called pods) of over 30,000 third-party open-source libraries for use with Xcode software development projects. App developers use external libraries (e.g., open source software, reuse of software from another project) to add known and tested functionality to their software project. Using CocoaPods allows version management of the external libraries to be independent from the version management of the project files. Effective version management is one of the tenets of software development best practices. A significant amount of information on how CocoaPods works is found at CocoaPods.
Installation of CocoaPods
CocoaPods relies on Xcode command line tools. If Xcode has been recently installed or updated to a new version, then first, launch Xcode, open ‘Preferences‘ and select the ‘Location‘ tab. Enable ‘Command Line Tools‘.
The CocoaPods software program is written using Ruby and can be installed (or updated) as a gem using the default Ruby software available on Mac OS using the following command in the Mac OS terminal window from the home folder:
sudo gem install cocoapods
Then, enter this command in the Mac OS terminal window:
pod repo update
Since the entire pod spec library is downloaded during the step and stored in ~/.cocoapods folder, it will take some time to complete.
To update the CocoaPods software program to its latest released version, re-enter the previous two commands.
Podfile
A podfile is a project-specific text file that specifies the library dependencies for a specific Xcode software project and resides in the Xcode project folder (i.e., same folder as the ‘*.xcodeproj‘ file. A typical Podfile specifies the device platform and a list of libraries with some versioning info. Note: Since it needs to be a text file, TextEdit or MS Word should not be used. A real text editor (e.g., Atom) should be used.
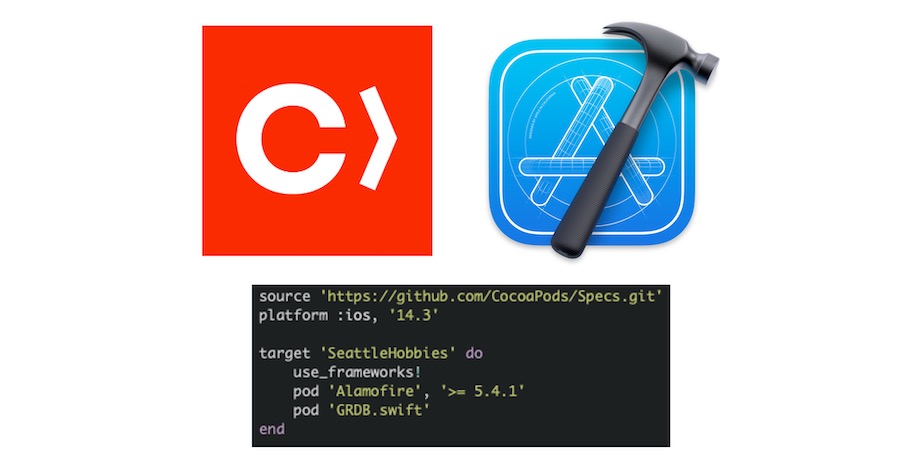
Either create a new podfile or open an existing podfile and edit it, as needed. Examples of podfiles are shown below for a single platform (i.e., ios, ‘14.3’) simple Xcode project with a single target ‘SeattleHobbies’ and for a multiple platform (i.e., ios, ‘14.3’ and osx, ‘10.15’) Xcode project with targets ‘SeattleHobbies’ and ‘SeattleHobbiesMac’:
source 'https://github.com/CocoaPods/Specs.git'
platform :ios, '14.3'
target 'SeattleHobbies' do
	use_frameworks!
	pod 'Alamofire', '>= 5.4.1'
	pod 'GRDB.swift'
end
source 'https://github.com/CocoaPods/Specs.git'
def shared_pods
  pod 'GRDB.swift', '>= 5.2.0'
  pod 'Valet', '>= 4.1.1'
  pod 'JWTDecode', '>= 2.5.0'
end
target 'SeattleHobbies' do
  platform :ios, '14.3'
  use_frameworks!
  shared_pods
end
target 'SeattleHobbiesMac' do
  platform :osx, '10.15'
  use_frameworks!
  shared_pods
end
Notes:
After the Podfile has been created, it needs to be installed from the Mac OS terminal command line from within the Xcode project folder (note: Xcode should not be open during this step).
pod install
This command will create a pods project within Xcode and a project workspace file (*.xcworkspace). From this point on, the project workspace (*.xcworkspace) must be opened to continue with project software development instead of the xcode project file (*.xcodeproj).
Within Xcode
When the project workspace is opened in Xcode, a pod project with each library (e.g., Alamofile) listed in the Podfile is now included in the left project folder pane in addition to the original project.
To use a pod, import it into the project files. For example:
import Alamofire
By adding the following to Build Settings -> User Header Search Paths, Xcode will support autocomplete when entering import statements:
${PODS_ROOT}
Updating Pods
Since pods are external software libraries that are managed and updated by their incredibly talented owners, updated pods need to be folded into an Xcode project for the app software to remain up to date with any changes in its pod dependencies.
There are a few steps to incorporate an updated pod into an Xcode project:
Step 1: Is an update available for a pod?
First, the version of the pod that is currently used in the Xcode project is checked. Using a text editor, examine the contents of the text file, ‘Podfile.lock‘ (located in the Xcode project folder), to see the pod versions currently used.
An example ‘Podfile.lock‘ with two pods and their version dependencies is shown below. Note: The long sequence of ‘x’ characters in the example are just replacing the checksums that are part of the actual ‘Podfile.lock‘.
PODS:
  - Alamofire (4.8.1)
  - GRDB.swift (3.6.2)
DEPENDENCIES:
  - Alamofire (>= 4.8)
  - GRDB.swift
SPEC REPOS:
  https://github.com/cocoapods/specs.git:
    - Alamofire
    - GRDB.swift
SPEC CHECKSUMS:
  Alamofire: xxxxxxxxxxxxxxxxxxxxxxxxxxxxxxxxxxxxxxxx
  GRDB.swift: xxxxxxxxxxxxxxxxxxxxxxxxxxxxxxxxxxxxxxxx
PODFILE CHECKSUM: xxxxxxxxxxxxxxxxxxxxxxxxxxxxxxxxxxxxxxxx
COCOAPODS: 1.5.3
Next, the latest available version of the pod is checked. Access the website, cocoapods.org, and type in the name of the cocoapod in the search field. The search results will list the cocoapod and show its current version. Clicking on ‘ Expand‘ will reveal a lot of information about the pod and its entire version history.
If the latest available version is more recent than the version used in the Xcode project, updating the pod is warranted.
Step 2: Update the pod spec library
To update the pod spec libary, rerun the following command in the Mac OS terminal window:
pod repo update
Step 3: Update the pod
To update the pod, run the following command in the Mac OS terminal from within the project folder (note: Xcode should not be open during this step).
pod update
This command will update the pods used in an Xcode project and the project workspace file (*.xcworkspace). As before, the project workspace (*.xcworkspace) must be opened to continue with project software development instead of the xcode project file (*.xcodeproj).
Step 4: Rebuild app within the Xcode project
At this point, launch Xcode and reopen the project. Press shift-cmd-k (menu -> Product -> Clean) to clean and click on the build-run button (cmd-B and cmd-R) to rebuild and run the app.
Removing a Pod
A pod can be removed by deleting the relevant line from the Podfile that resides in the project folder and effecting the change from the command line within the project folder (note: Xcode should not be open during this step):
pod install
Removing all Pods from a Xcode Project
Recently, I used Swift Package Manager (SPM) from within Xcode to add package dependences to a project instead of Cocoapods. To remove all trace of Cocoapods from a Xcode project, start by using the following command in the Mac OS terminal window from the home folder:
sudo gem install cocoapods-deintegrate
Use the following command on the Mac OS terminal command line from within the Xcode project folder (note: Xcode should not be open during this step).
pod deintegrate
Although this command removes all pods from the Xcode project, a few manual steps are still needed. Using terminal, or the file manager, remove the following files:
‘Podfile‘
‘Podfile.lock‘
‘*.xcworkspace‘
From this point on, the project file (*.xcodeproj) must be opened to continue with project software development.
Reference Information:
The first five listed references are guides from CocoaPods. The final reference describes use of Git and CocoaPods.
Getting Started with CocoaPods
CocoaPods Tutorial for Swift: Getting Started
Credits
The Xcode logo is a copyright and trademark of Apple.
The CocoaPods logo is a copyright and trademark of CocoaPods.


