Updated: June 2025
Overview
This post is the fourth of a 6-post series with step-by-step procedures that I use to setup a simple WordPress website on AWS. In this post, WordPress is installed onto the AWS EC2 instance. The three main steps to install WordPress are: setup a WordPress database in MySQL, create a site configuration file for Apache to host WordPress, and install WordPress.
Note: The original version for this series was written in 2016 with EC2 servers running Ubuntu 16.04. This series has been completely updated in mid 2025. An example website, Seattle Hobbies, will be used throughout this series. The development of the Seattle Hobbies website assumes a simple low-maintenance website with low visitor count with no auto-scaling or redundancy. As such, implementation and configuration are easy. I will most likely seek the support of professional web-dev experts if I want to establish a sophisticated website that handles commerce or significant traffic with lots of site visitors.
If not logged in, then log into AWS SSH as user2 (e.g., alternate user from previous post) via a command line interface (e.g., terminal on the Mac or PuTTY on Windows) as described in AWS WordPress 2: Improve Security.
WordPress Database
To create a database named ‘wordpress’ in MySQL, use the following command to enter MySQL. Two passwords will be required: sudo level access password from the early step (e.g., password) and the MySQL database password for user2.
Enter the following MySQL lines replacing user2 with your username and pwd with the real password established during installation of MySQL (ref: AWS WordPress 3: Setup LAMP. Note the use of single quotes and semicolons in each of the lines with the MySQL commands. If an enter key is pressed without completing the command, mySQL allows completion on the next line (e.g., missing semi-colon, which is really common).
The command SHOW DATABASES returns a list of MySQL databases, which should include the recently-created wordpress database. The command SELECT user FROM mysql.user; returns the list of users, which should include the recently created user. The command SHOW GRANTS FOR ‘user2’@’localhost’; returns the list of grants for ‘user2’@’localhost’.
For additional information on MySQL, refer to: MySQL 8.0 Reference Manual
Site Configuration File for Apache
To create a site configuration file for Apache to host WordPress, change to the following directory:
Create a site configuration file using the nano editor:
and enter the following. Replace domain.com with the real site domain name (e.g., seattlehobbies.com).
Enter ctrl-x, type y, and return to save.
Then enable the wordpress configuration and restart Apache2.
Install WordPress
To download, install, and configure WordPress, start with this set of commands.
Set Apache2 web server permissions on the ‘/var/www’ directory:
Download WordPress, expand archive and change permissions:
Temporarily, set the permissions on wordpress as shown:
Remove the downloaded file:
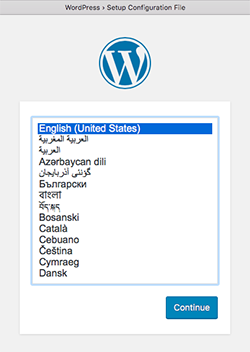
To verify if the WordPress installation was successful, enter either the elastic IP address (e.g., http://44.247.136.248) or the website name (e.g., http://seattlehobbies.com) into a web browser and, hopefully, see the familiar starting page for WordPress setup:

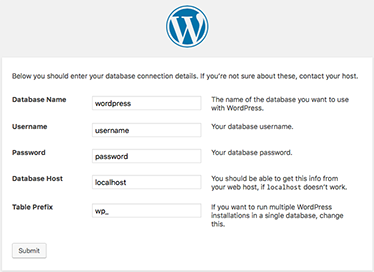
After selecting the language, an informational page is displayed. All of the requested information was defined during the previous installation steps. Type in the name of the database: wordpress. Replace username with the real username (user2 in this example) and password with the real password for user2. The default values in the remaining fields are valid.

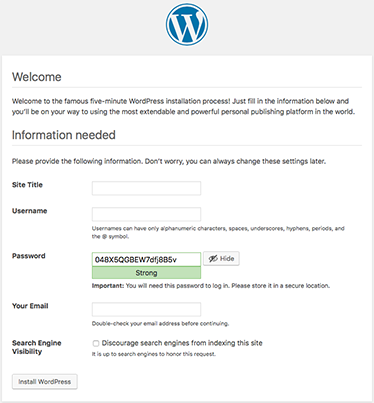
If information confirmation is successful, then the following WordPress screen is displayed:

Fill in the requested info and click on ‘Install WordPress’.
Lock down the permissions for the wordpress directories and files:
A line should also be added to the ‘wp-config.php’ file:
Add this line just above the “stop editing” line:
Enter ctrl-x, type y, and return to save.
Open a web browser and navigate to ( http://domain.com/wp-admin)) where ‘domain.com’ is replaced with the real website name (e.g., http://seattlehobbies.com). Enter the username and password defined during WordPress setup and login. The WordPress dashboard should be displayed.
Nice work!
