Updated: December 2020
Overview:
With a global app market, it only makes sense to develop apps that operate in native languages with cultural sensitivity. Apple has provided developers with a rich set of tools, features, and functionality to support well over a hundred different world languages.
At first, the problem seems simple – just replace the text with a language-specific version. Instead of defining the text that gets displayed as hard-coded strings within the software, the text for each language/region is defined in a separate strings file. A language-specific strings file within each app is selected (if the app supports language localization) by setting the language for the iPhone or iPad device in the device ‘Language & Region’ option under ‘General’ within ‘Settings’.
Even with all the support structure that is in place, providing a native language and an engaging cultural app experience is amazingly complex with a mind-numbing set of details to consider and resolve:
And, that doesn’t even begin to consider the accuracy of translations and relevant context. Some of the complexity of getting localization and internationalization correct is humorously presented by Tom Scott in the following video.
Tips and Best Practices:
I am using the following design guidelines and practices to enable localization and globalization for apps. Many of these guidelines and practices are not my own, but a collection of best practices from the developer community.
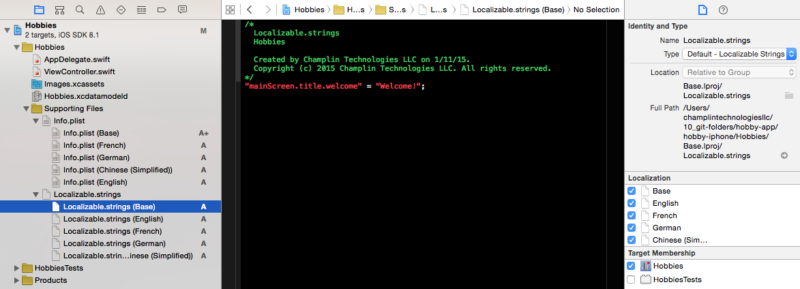
NSLocalizedString("aboutscreen.title.welcome", comment: "comment about context")
Configuring for Localization and Internationalization:
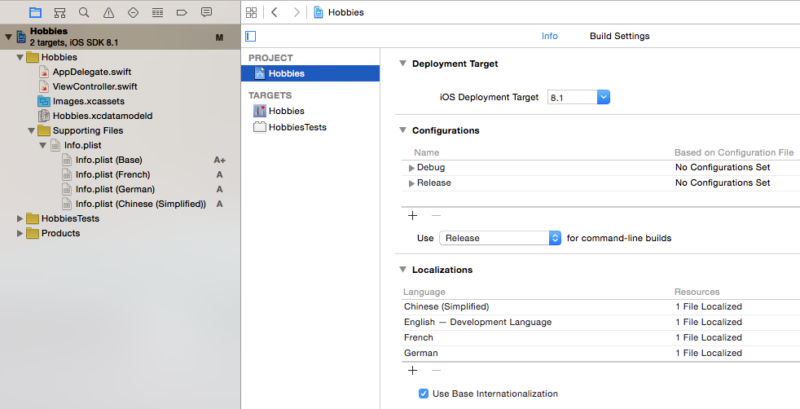
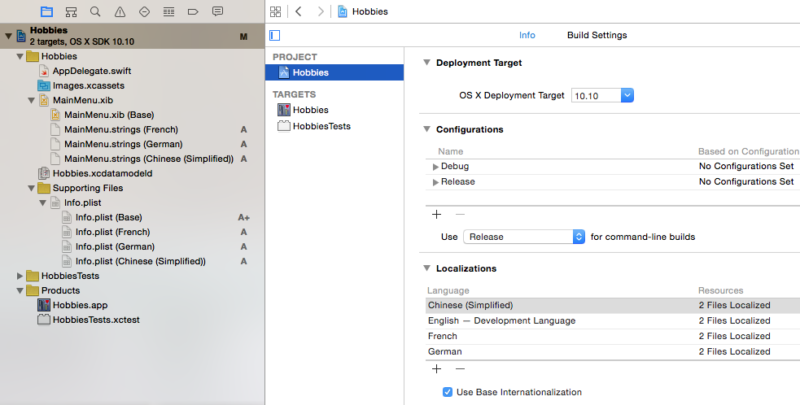
Project configuration to support localization and internationalization for the mobile device family (iPhone, iPad) and the Mac are slightly different. As such, each are separately described.
Commonality of Localization and Internationalization Resources:
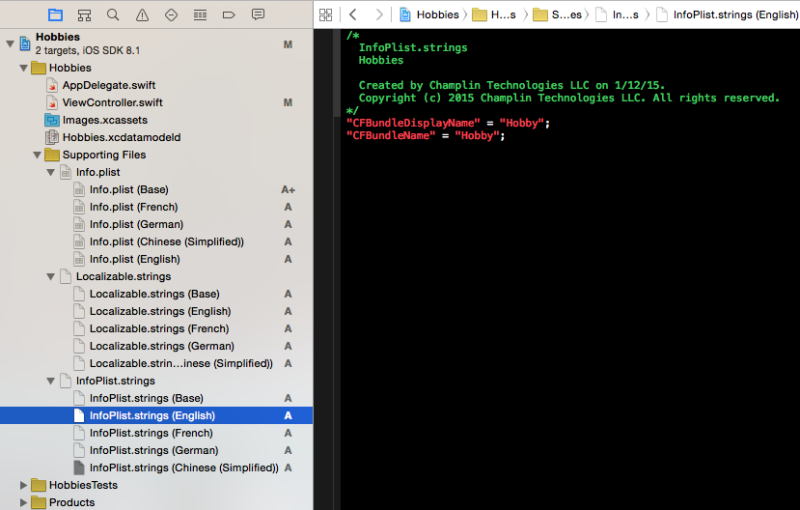
Some of the localization and internationalization files can be shared as a common resource for Xcode projects involving both an iOS and a MacOS target: ‘Localizable.strings’, ‘InfoPlist.strings’, ‘Localizable.stringsdict’. To enable sharing, check the box next to each target under ‘Target Membership’ in the Xcode ‘Inspector Pane’ for each file.
Testing Localizations:
Manually selecting a language on an iPhone or iPad (e.g., Settings app > General > Languages & Region) is not conducive to testing a localized app in development for two reasons:
Creating language schemes that can be selected as part of the Xcode runtime configuration is a more versatile app testing approach that works with either the device simulator or an actual iPhone/iPad device seamlessly. There are at least three ways to access the screen to create a localized scheme:
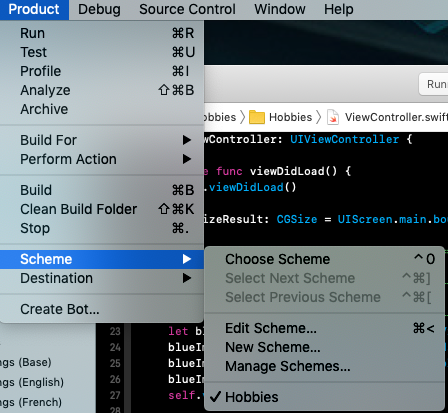
On the left side of the panel, select ‘Run‘ and select ‘Options‘ as shown.
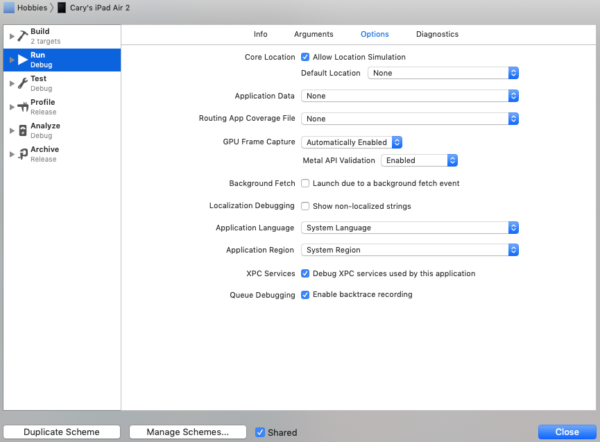
Select ‘Duplicate Scheme‘ and rename the scheme (i.e., top left corner). It is good practice to include the language in the scheme name. Then, select the application language (e.g., French) and application region for each localization scheme (e.g., France). Then, this scheme will override the current values in NSUserDefaults during app execution from Xcode. Selecting this scheme from the scheme list will change the localization for the app for testing without changing any other app’s localization on the actual device.

Summary:
To add localization and internationalization to an app takes extra effort and requires a healthy attention to detail. This post only touches on the first steps and doesn’t describe localizing date/time formats, plurals, number formats, currency formats, and getting language translations. And, that is why I identify with the following quote:
“Those who care enough to take the extra time to internationalize their app are very likely to be just as thoughtful when it comes to design and implementation.”
Reference Material:
Internationalization and Localization Guide
Internationalization – Right to Left Support for Mobile Apps
Where the &$!#% is localizable.strings?!?



Leave A Comment
You must be logged in to post a comment.